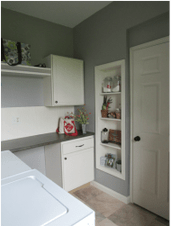
How to build a wall niche
A great way to add extra storage in your home is to utilize space in between your wall studs. It just so happened that this wall was once an exterior wall comprised of 2×6 studs instead of 2x4s making this spot in the laundry room very qualified!
The first step is to locate the studs using a stud finder. Typically, the studs in your wall are 16″ on center leaving you with a 14 1/2″ space. After you build the sides, you will have a width of around 13 – 13 1/2″.
Use a large level to draw a line on the wall where the studs are as well as the top and bottom. If there is an outlet or switch on that wall make sure you know whether the wires are coming from your basement or attic. If you have electrical running through the wall where you want to put your niche you will have to move it or patch the drywall back in.
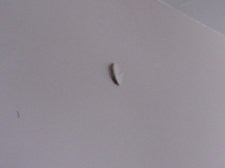
This particular spot had a stud running through it. Since there was no other space to put it and keep a usable width for the shelves, I decided to move the stud. There was already a header built over the entire wall so I didn’t need to worry about losing support. Keep in mind that since your drywall is screwed to your studs, that pulling a stud out of the wall will damage the drywall on the other side. (picture above). It’s easy to patch but make sure you have mud, touch up paint, and primer on hand.
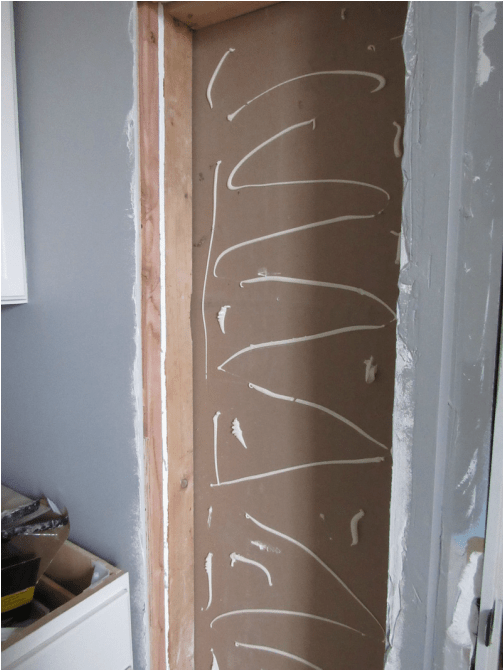
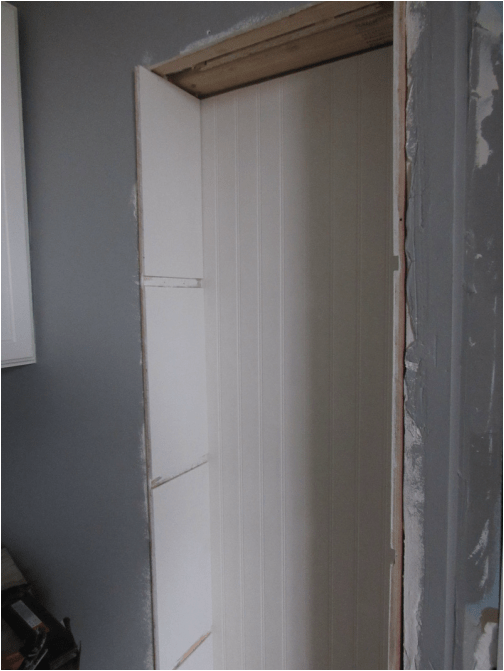
After you get the drywall cut out, you need to frame in a 2×4 at the top and bottom. In this case, since the wall was thicker (used to be an exterior wall), I used a 2×4 then ripped another 2×4 down on the table saw to make the wall depth even with the existing header. You can either toenail the 2x4s in or use a kreg jig to pre-drill holes.
There are several materials you can use for the backing — 1/4″ bead board, ship lap, mdf, 1/4″ plywood, ect. I used beadboard. You cannot nail or screw the backing in or you will see the nails or screws on the other side of the wall. Use liquid nails. Cut your material to the width and height. Spread a generous amount of liquid nails onto the wall and press your backing in.
The sides require 1x4s. 3/4″ plywood is okay for this step too. Rip the boards or plywood down to the width and height. From the top of each board, put a mark at 15″, 30″, 45″, ect or divide the height of your boards evenly and mark where you want the shelves. Then set your dado blade to the width of the boards you are using for you shelves (typically 5/8″ – 3/4″) and cut the slots half way into the width of your board. If you want your shelves adjustable, instead of cutting slots, predrill holes with a drill press (2 on each side). You will need to purchase shelf clips or dowel pins before you drill so you know what size hole to drill. Install the sides with finishing nails. I used a brad nailer and filled the holes with wood filler.
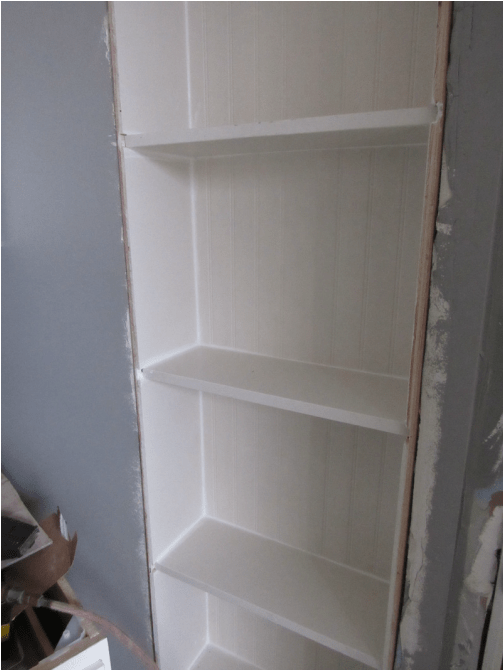
Next cut your shelves to width and slide them into your dado on your shelf side. Use glue. Allow to dry before you paint.
If you are using paint, you can use painter’s caulk to caulk all of the corner and edges. I always prefinish all of my boards (sand, prime, and paint) before installation since wood shrinks and expands with the weather. Then I touch up the paint after the caulk dries. The last step is to add trim to cover all of the raw edges of the wood.