
How to Build Custom Cabinets
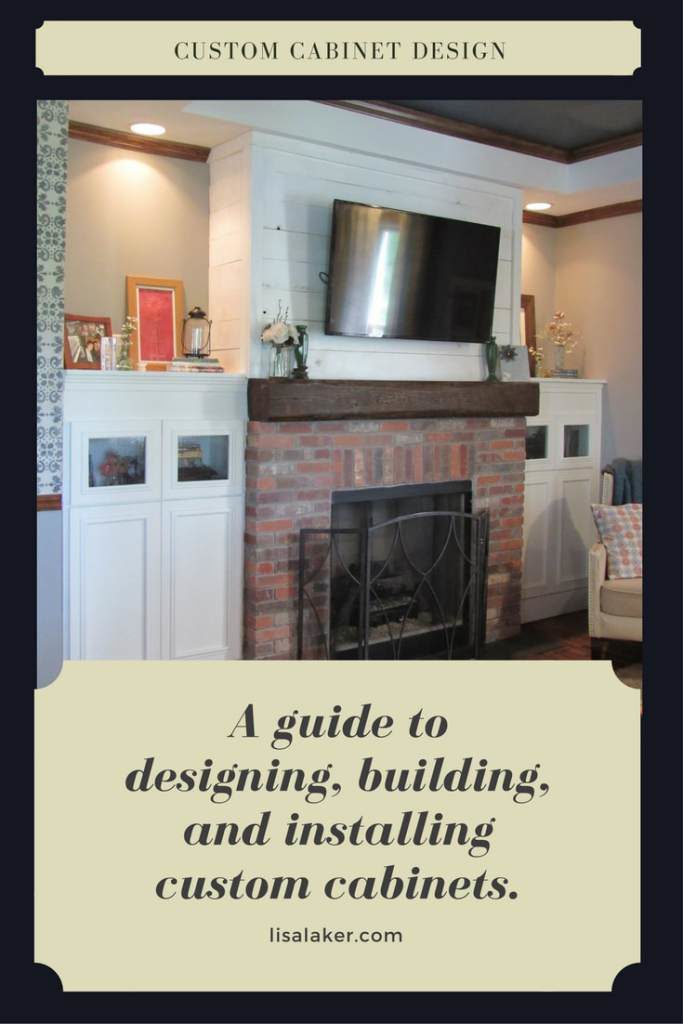
I wanted the cabinets on each side of the fireplace to be the height of my mantle. Since my living room is small, keeping the cabinets and mantle the same height creates a clean line. And it also eliminates the need for shelving above the cabinets which I also thought would contribute to a busier look than I wanted.
The Design:
Flush Toe. I don’t need a toe kick. This isn’t a kitchen cabinet that I will be working at. Plus, I want it to look more like furniture.
Double doors: I want glass doors at the top so we are able to store our dish receiver, blue ray player etc and will still be able to use it with a remote. I want seedy glass so that everything inside is a little distorted. Seedy glass is about 6-8 x more costly than clear glass. Clear glass is around $3 sq/ft and seedy glass is about $18 sq/ft. There are things worth splurging on.
I wanted solid doors on the bottom to hide kids toys, games, my office stuff, and junk.
Adjustable Shelves: I wanted adjustable shelves in the bottom portion of the cabinet
Door Placement: I wanted the doors to all sit below the mantle. Our mantle is an 8″ thick barn beam. So instead of just having dead space above the cabinet, I made a last minute decision to turn the top into a hidden compartment. This will be perfect to hide Christmas and Easter gifts until the kids grow up and realize it’s there!
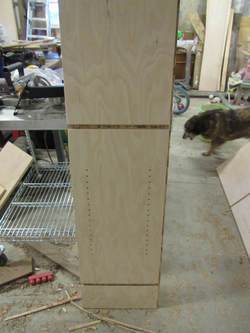
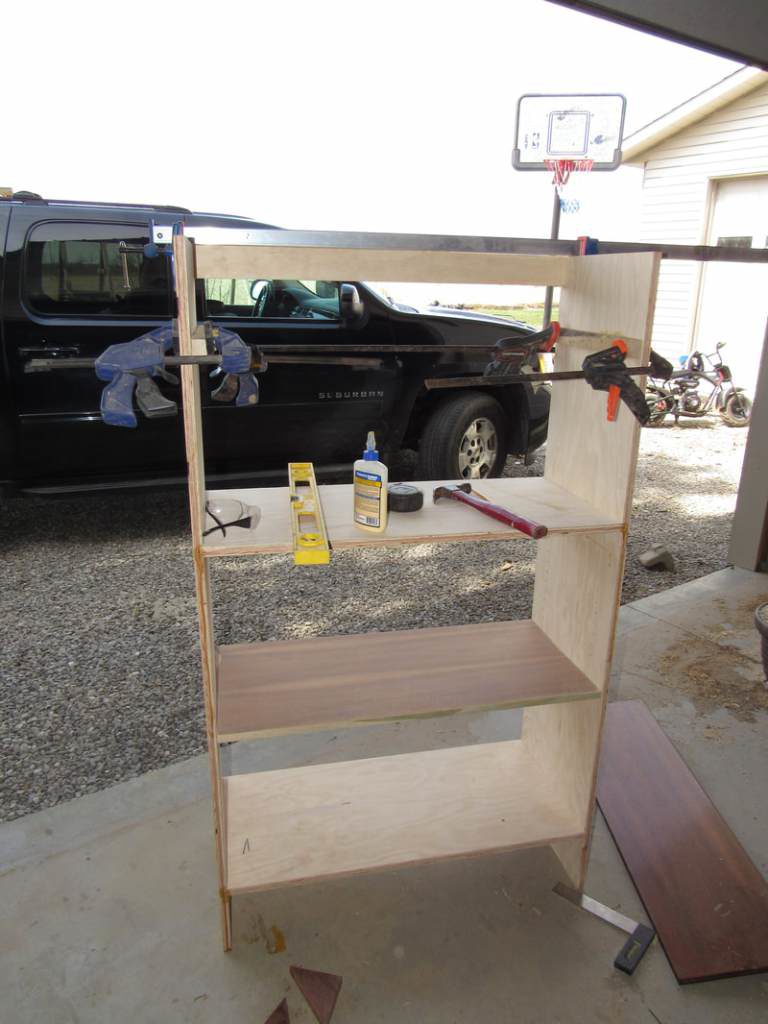
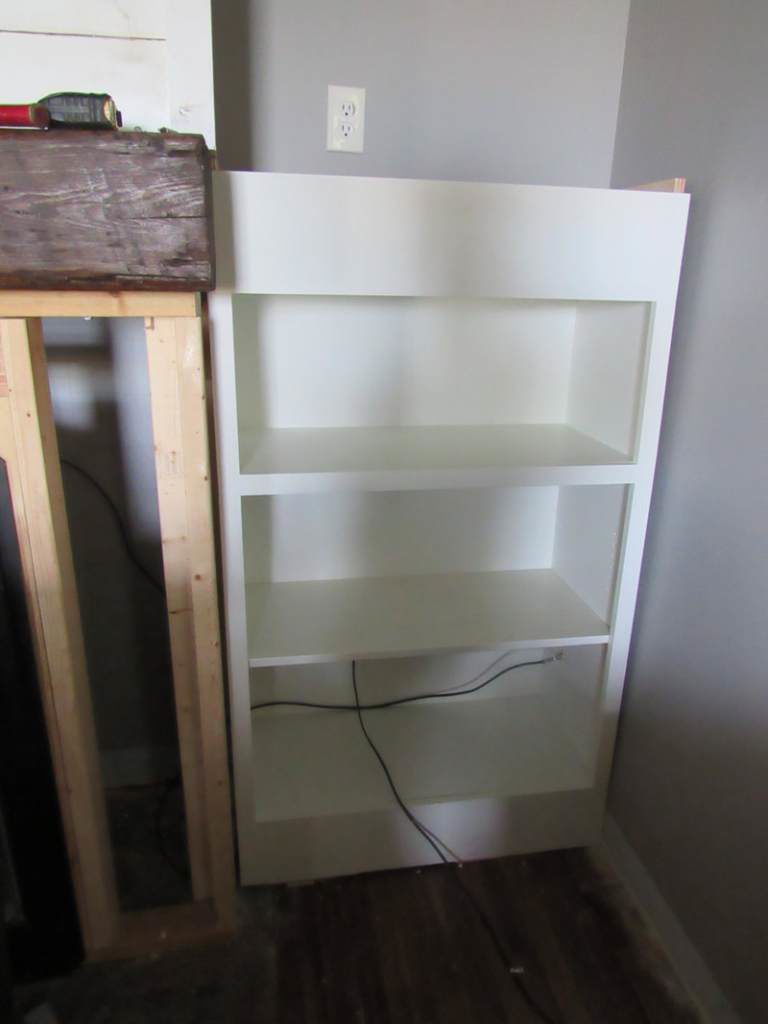
Determine the width, depth, and height of your cabinet. Cut the sides from 3/4″ plywood, deducting 3/4″ for the face frame.
Again, I am not doing a toe kick on this cabinet and I want the doors to sit above my base molding which is 5″. So I cut the first dado 3/4″ wide, 6″ above the bottom of my side panel. I wanted the top opening to be 12″ so I cut the second dado at 36″ high. Then I cut a 3/8 deep x 1/4″ rabbet on the back edge for the 1/4 plywood back panel.
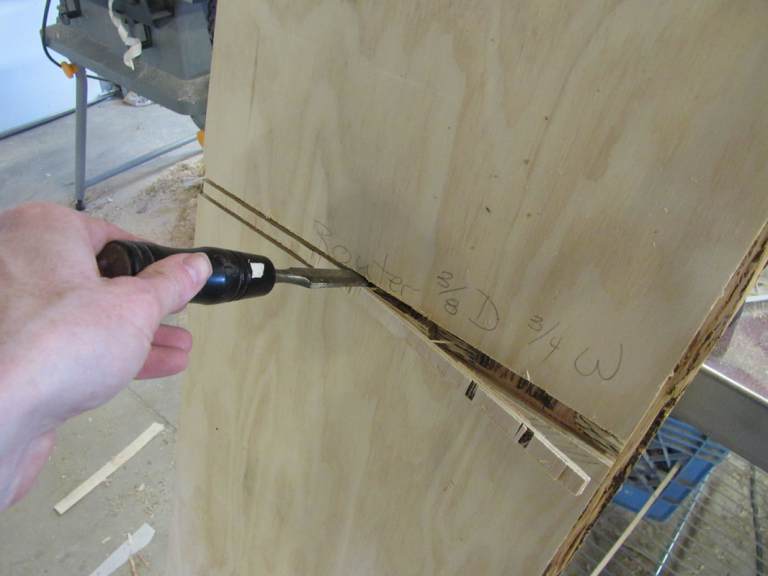
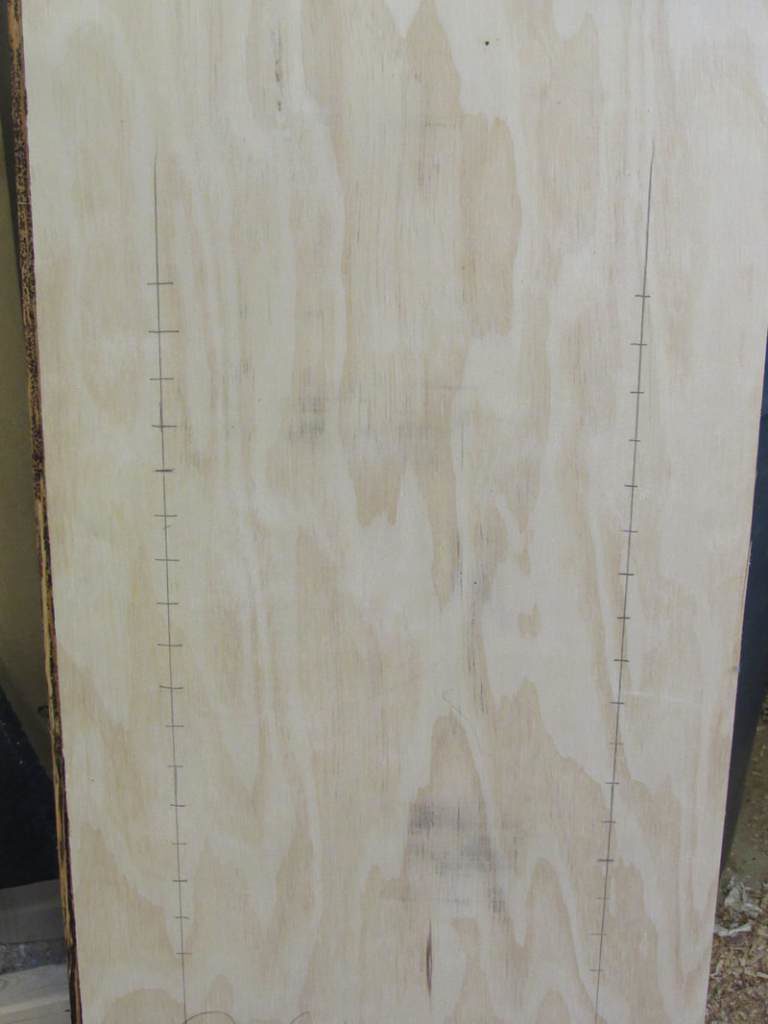
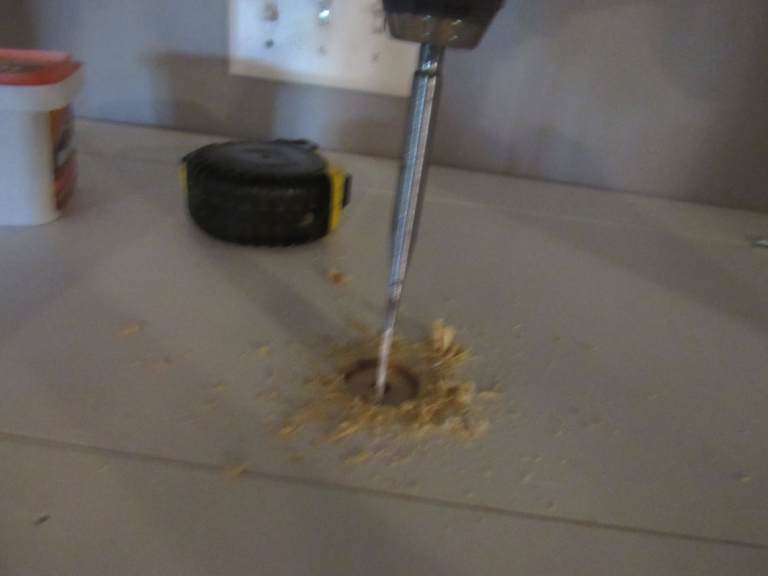
I drew a vertical line in between the dado cuts 2 1/2″ from the edge on the inside front and inside back of the cabinet. Starting 9″ above the bottom dado, I put marks across the vertical line every 1 1/2″. Then used the drill press with a 3/8″ bit to drill 1/2″ into the wood to hold the pegs for my adjustable shelves.
Next, subtract 3/4″ from the width of your cabinet and cut your fixed shelves to width. Then subtract 1″ from the depth of your cabinet and cut your fixed shelves (the 1″ comes from the 3/4″ face frame and 1/4″ back panel. Spread plenty of glue into your dados and put your cabinet together. Make sure your cabinet is square and clamp front and back of each shelf. Check to make sure it’s square again. Cut the adjustable shelf to length by using your cabinet width – 1 1/2″ and deducting 1″ from the depth. Slide them into place while your cabinet dries.
Since it was a last minute decision to make the hidden compartment in the dead space of the top section, I glued and screwed a scrap 1×2 10″ down from the top. After it dried, I flipped the cabinet over and nailed 3/4″ plywood cut the same length and depth of my adjustable shelf to the bottom.
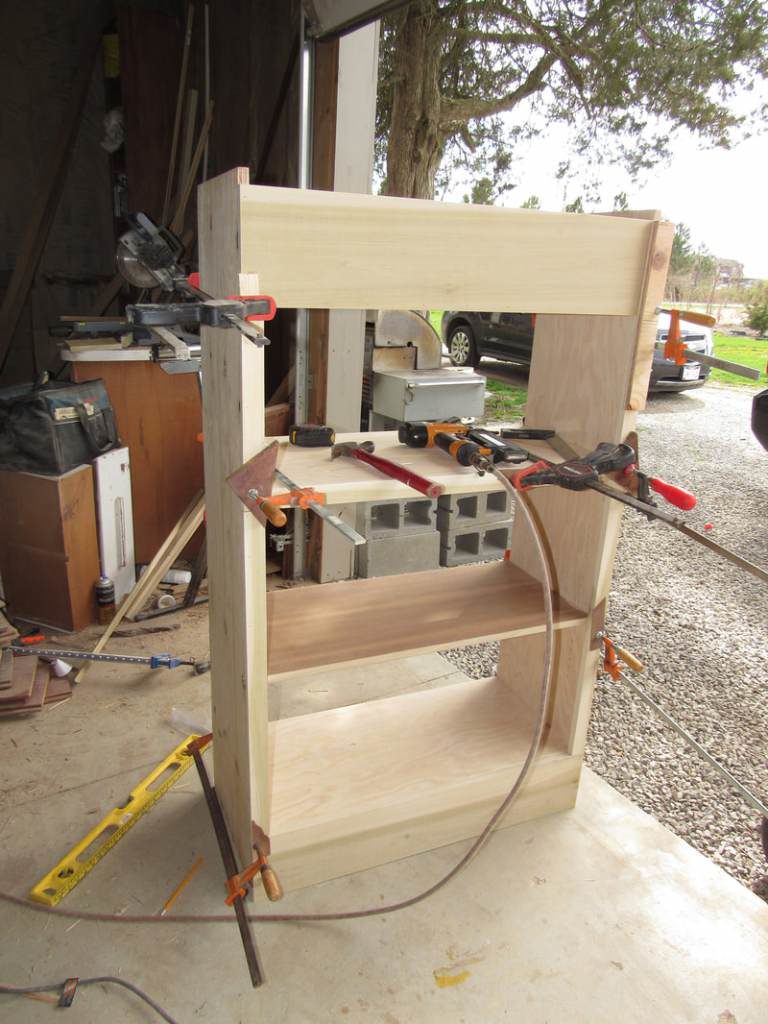
Then cut your frame. Stiles are vertical and rails are horizontal. Cut your rails first. Glue, clamp, and nail. Use blocks of wood under your clamp to keep the clamp from denting your wood. Check that they are level before you nail. Then measure and cut your stiles. Glue, clamp, and nail. Cut your back out of 1/4 plywood or luan. Glue and nail it into place.
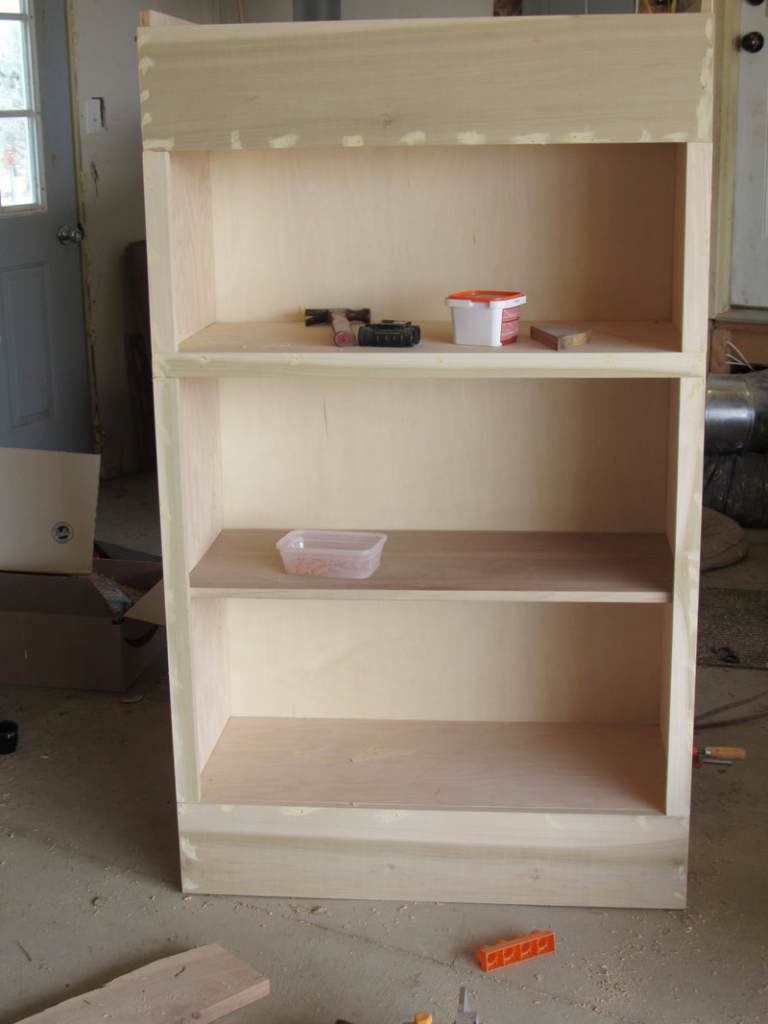
Sand the cabinet and adjustable shelves with 120 grit paper. Fill the nail holes. Sand again with 220 grit paper. Shop vac the dust out and wipe it down with a lint free cloth and mineral spirits.
Prime. If you don’t have a sprayer, use a can of spray primer to for the holes and a foam roller for the rest. Sand again after it dries with 220 grit paper. Shop vac again and wipe down with a damp cloth again.

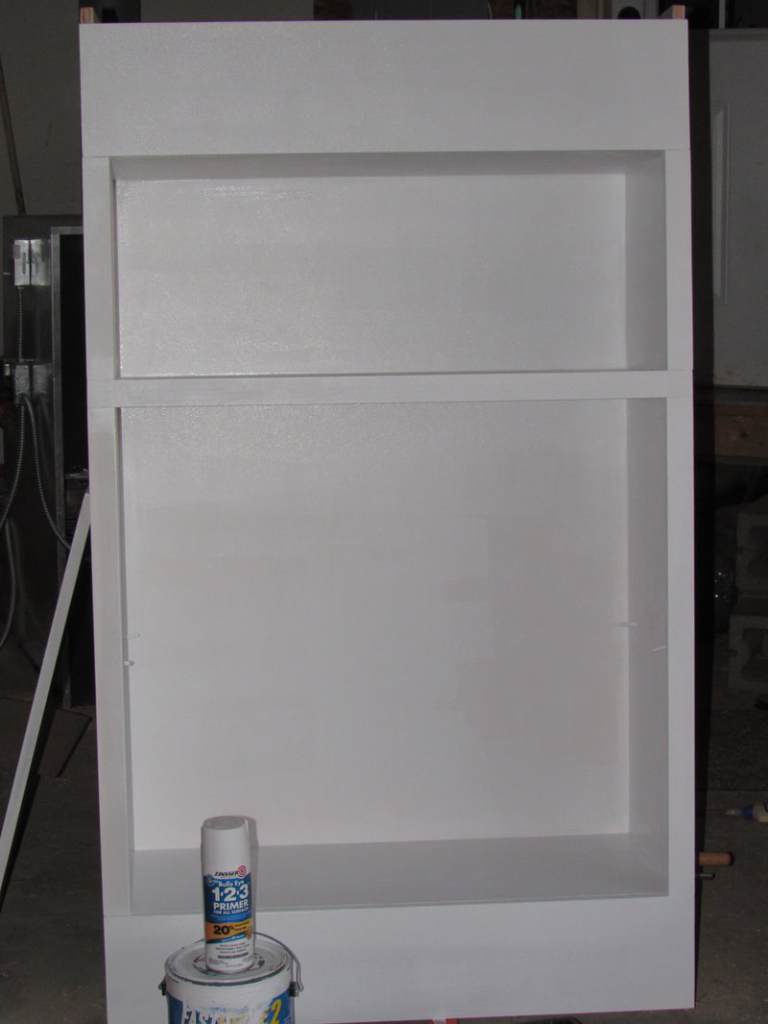
I love Sherwin Williams Proclassic Paint for my cabinetry. It dries smooth and hard so it gives a nice professional finish. (see my recommended paint brands here) Foam roller and paint brush — sand with 220 between coats. OR use a sprayer but still sand between coats.
Since these cabinets are fitting in between 2 walls and my house was built in the late 1800s, I deducted 1″ from the total width of my opening before I built the cabinet so that I would have plenty of room to make sure the cabinet was sitting level. (For new construction 1/2″ would be plenty.) Obviously, the brick that I am facing the fireplace with will cover the gap on the left, But the right side I will have to cut a trim piece special to close the gap. This IS expected in old houses. I also wanted to install the cabinets before I put the top and trim pieces on because I know the corner isn’t square and I want the pieces to fit snuggly. After the doors are installed, I’ll finish all the trimming.
For the top, you can either measure the width and depth needed and nail it on OR create a hinge top like I did here.
For the top, cut a 1×3 and a 1×12 length. Then cut into the edges for the butt hinges. Install the back piece with glue and nails. Attach the 1×12 to the installed 1×3 with the hinges. Drill a finger hole with a spade bit. Then cut another 1x? to length and width giving it a 1 1/2″ overhang. Add a 1×3 below it and if desired a piece or decorative trim. Since I’m building applied molding doors, I want this piece to tie the style of my doors to the cabinet. Then add a 1×6 to the bottom. This will bring the bottom of the cabinet out even with the doors. All of the top pieces were primed and painted and sanded before installation. Add filler to nail holes. Sand and paint.


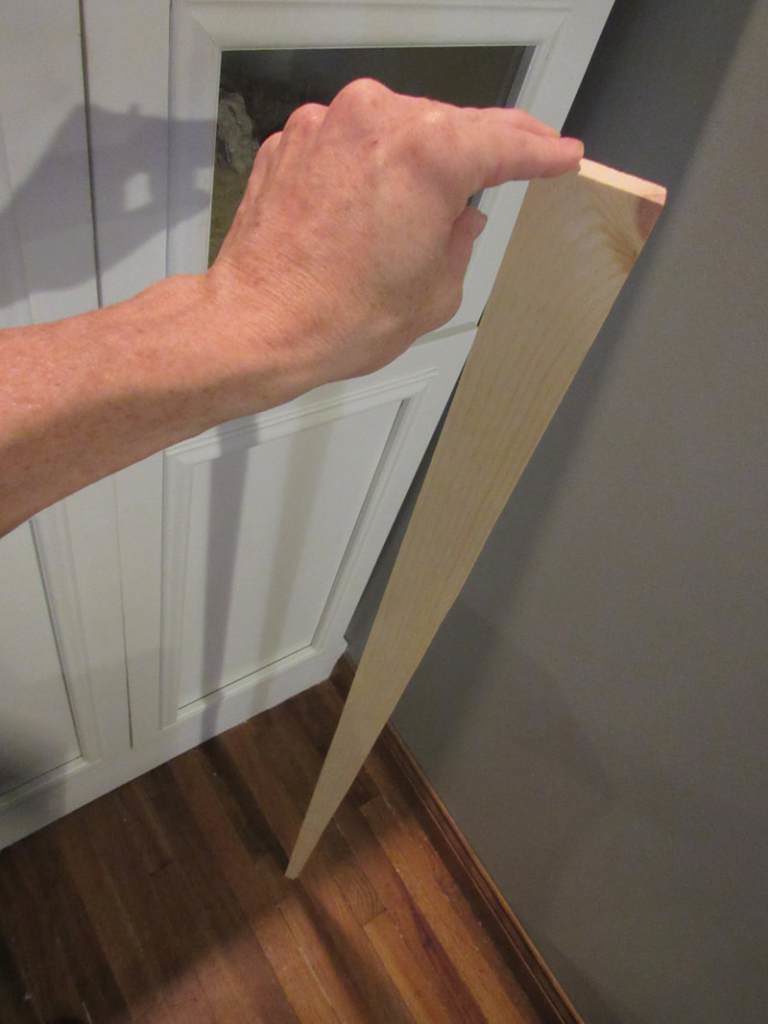
I would typically use a piece of scribe molding to cover gaps between walls and cabinets, but in this case scribe molding won’t cover so I special cut a 1×2. I did have to take it back to the table saw a couple times to shave off a couple spots so that it would fit perfectly against the wall.