
Breadboard Table Top
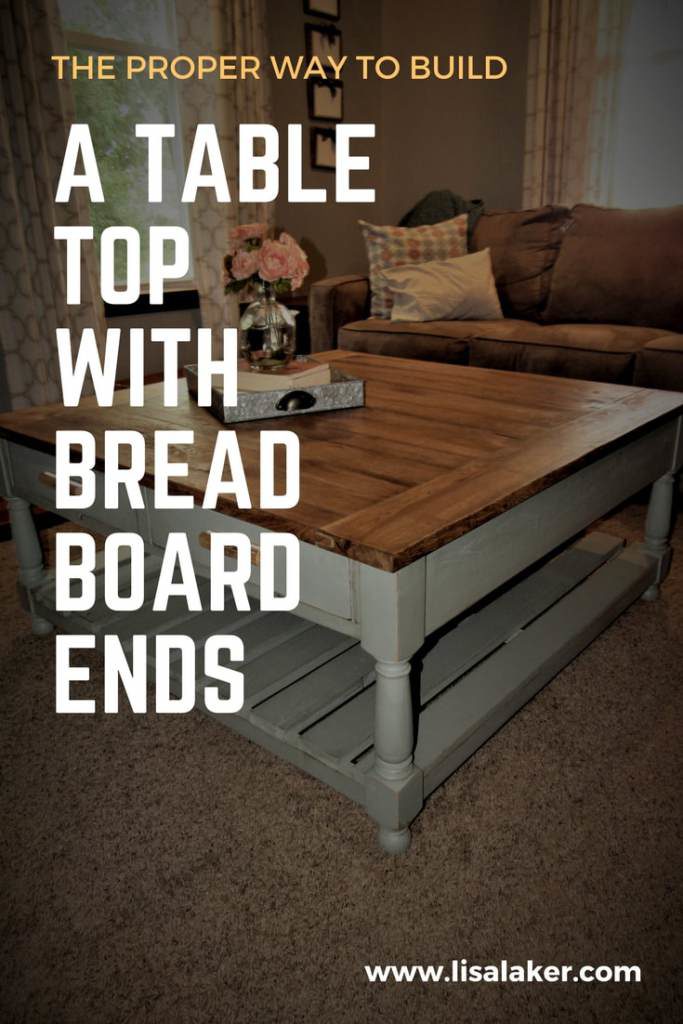
Although many, many table plans say so, a farmhouse style table top with breadboard ends cannot be screwed together! See why here. That being said, here is the proper way to build a table top that will last and remain beautiful for years.
Disclosure: This post includes affiliate links, which means I receive a small commission if you make a purchase through my links. There is no extra cost to you. Purchasing through my affiliate links help support my website so I am able to continue posting free content.
Tools you need for this project:
Ear protection
Eye protection
Table saw
Pencil
Biscuit Joiner
Biscuits
clamps – at least 2 but the more the merrier!
4-8′ pipe clamp (depends on your table length) purchase 3/4″ pipe in the needed length lat your local hardware store
plunge router
1/4″ upspiral router bit
Drill
1/4″ drill bit
handsaw
hand plane – if needed
orbital sander
Materials you need for this project:
Lumber
1/4 x 1″ dowel pins
glue
120 and 220 grit sandpaper

1. Determine the length and width of your table top. I am building a top that is 42 x 42.
2. Subtract the width of your breadboard ends from the table top length and add 2″. My breadboards are 5 1/2 wide so my long boards are going to be 33. (42-11+2).
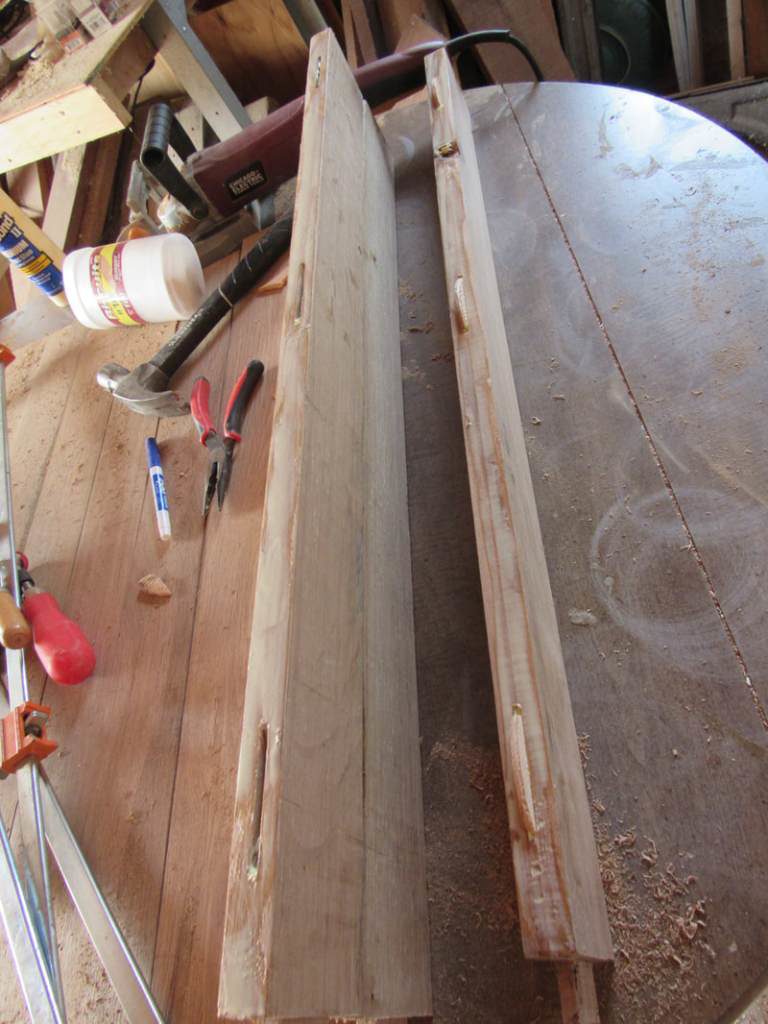
3. Create a 1″ tenon on each end of your long boards. See how here.
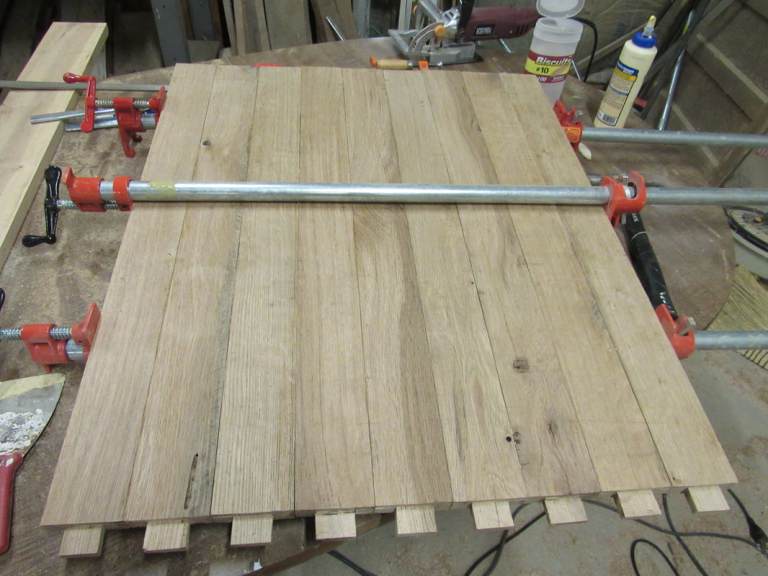
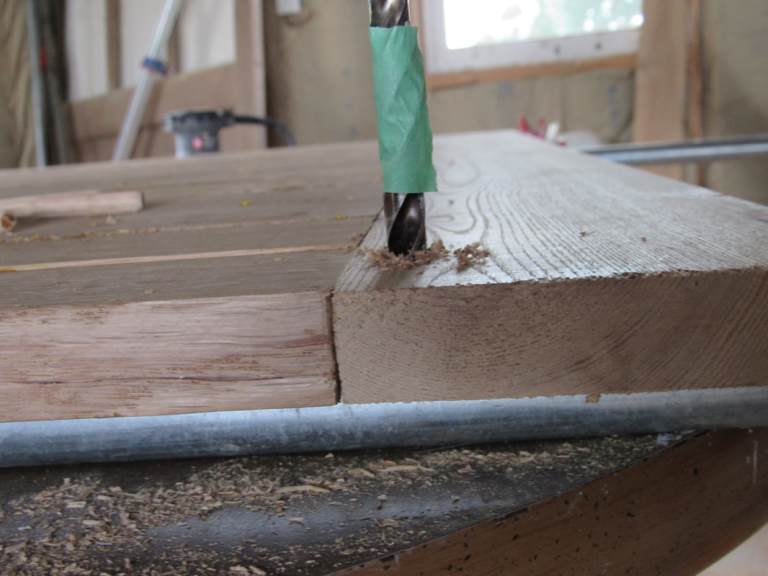
4. Join the boards together two at a time with a biscuit joiner. Glue and clamp. Allow to dry. Continue to join the boards together until your table top is complete. Be careful to keep them lined up perfectly. Use pipe clamps to clamp the entire width.
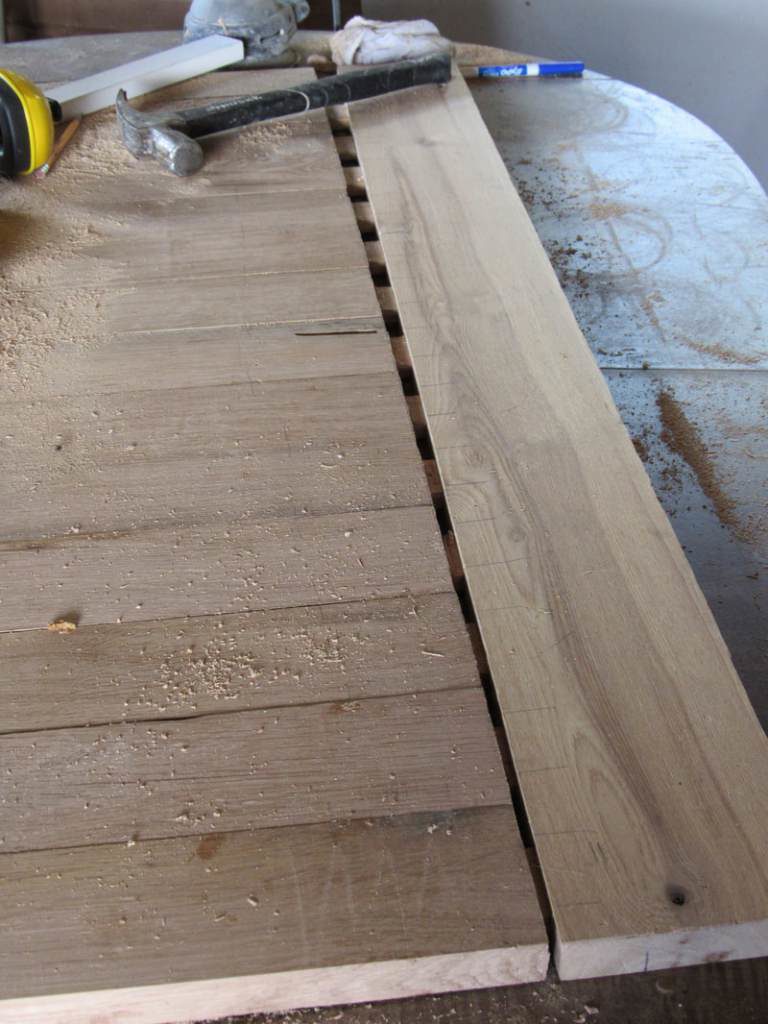
4. Transfer all of your tenon measurements to the inside edge of your breadboard. Use a plunge router with a 1/4″ upspriral bit to cut in your mortises. See how here. Except for the center hole, the mortise hole need to be slightly wider than the mortises to allow for expansion and contraction.
5. Attach breadboard and clamp tight to the table.
6. Flip your table top over so that you see the underside.
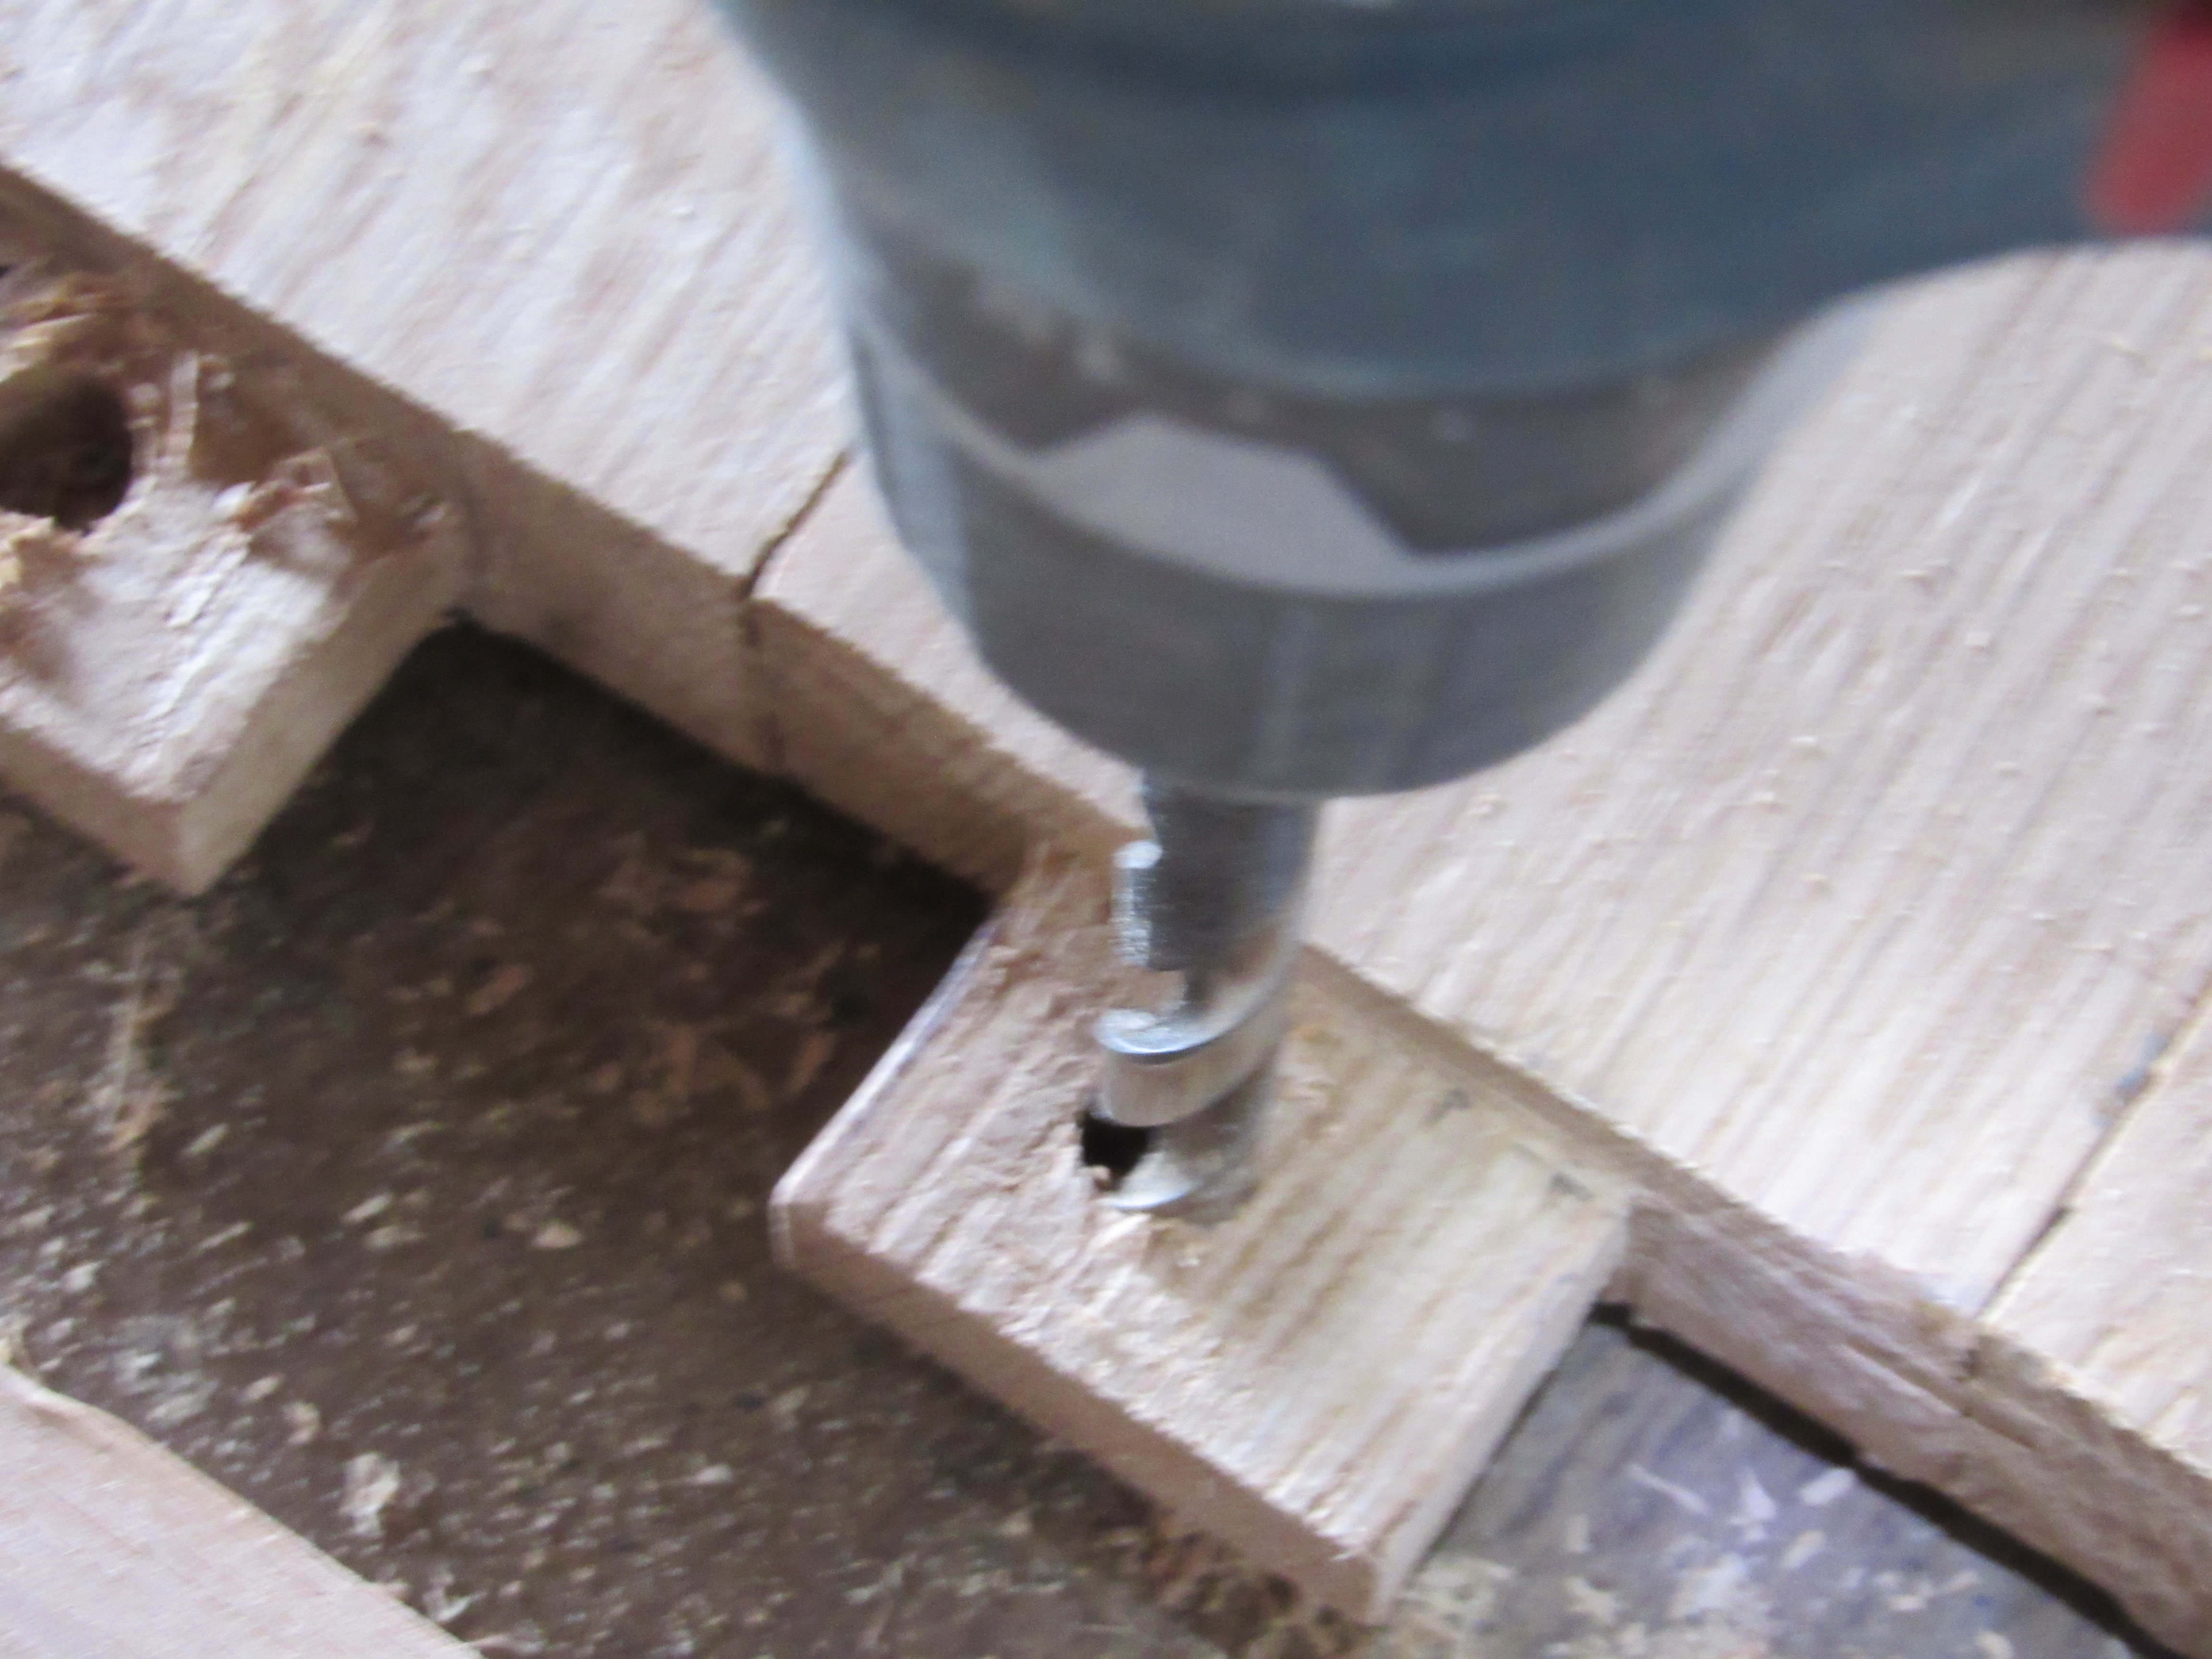
7. Drill a hole 5/8″ deep through the breadboard and into each tenon. (Assuming your wood is 3/4″ thick.
8. Remove the breadboard and slightly widen each hole by reinserting your drill bit and slightly rocking it left and right.

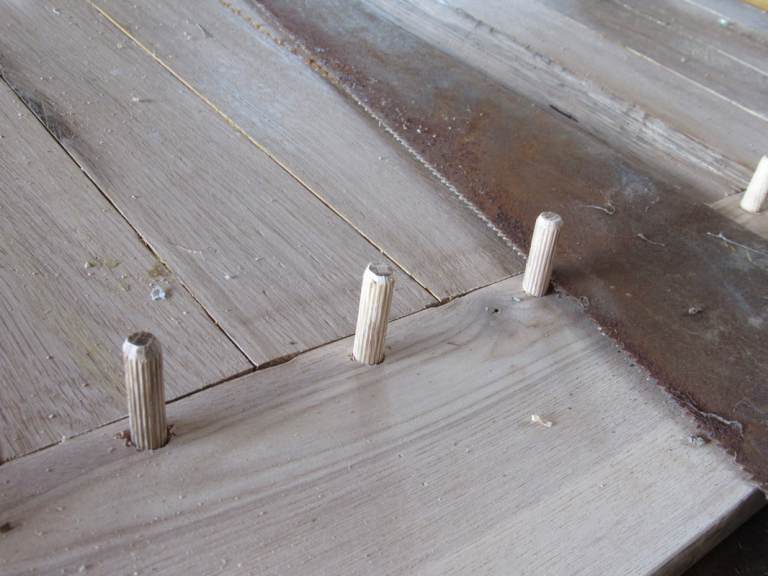
9. Reattach breadboard WITHOUT GLUE. Clamp it tight to the long boards again.
10. Insert 1/4 x 1″ dowel pins. Use a handsaw to cut off the top flush to the table.
11. Flip table back over. Use a hand plane to smooth out the table tops anywhere the table didn’t join flush.
12. Apply finish. For the finish pictured above, click here.