

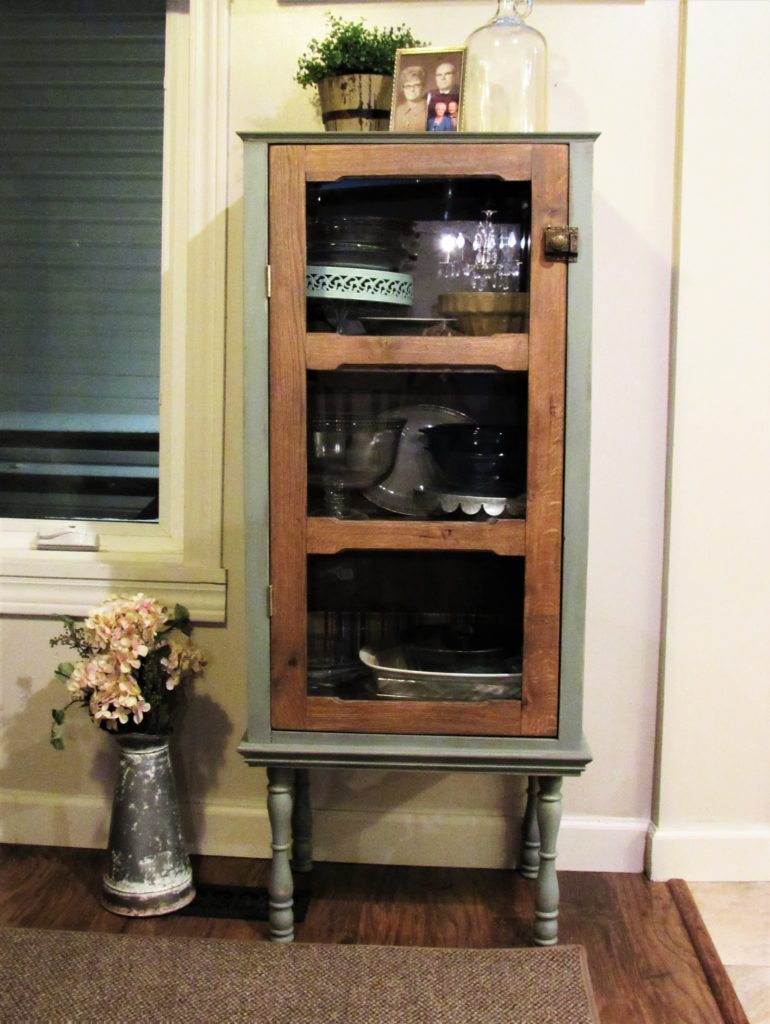
Antique Style Cabinet Door
When I designed my jelly cabinet, I wanted to build an antique style cabinet door with mullions. But since I don’t have the right tools to do so, I decided to build a 3 panel glass door instead. Enjoy these free woodworking plans!
Disclosure: This post includes affiliate links, which means I receive a small commission if you make a purchase through my links. There is no extra cost to you. Purchasing through my affiliate links help support my website so I am able to continue posting free content.
What you need for this project:
Materials
(3) 1 x 3 x 4′ oak
wood glue
120 and 220 grit sandpaper
Stain(I used minwax special walnut and minwax weathered oak)
Mineral Spirits
Satin Polyurethane
foam brush
clear single pane glass (order after is complete)
Tools
Orbital Sander
Table saw
Miter saw
Plunge Router
1/4″ upcut spiral bit
round over router bit (optional)
(4) 3′ clamps
Brad Nailer and 5/8″
Air compressor
- Cut door styles to length. Stiles are vertical and rails are horizontal. Stiles should be 1/8″ shorter than your door opening.
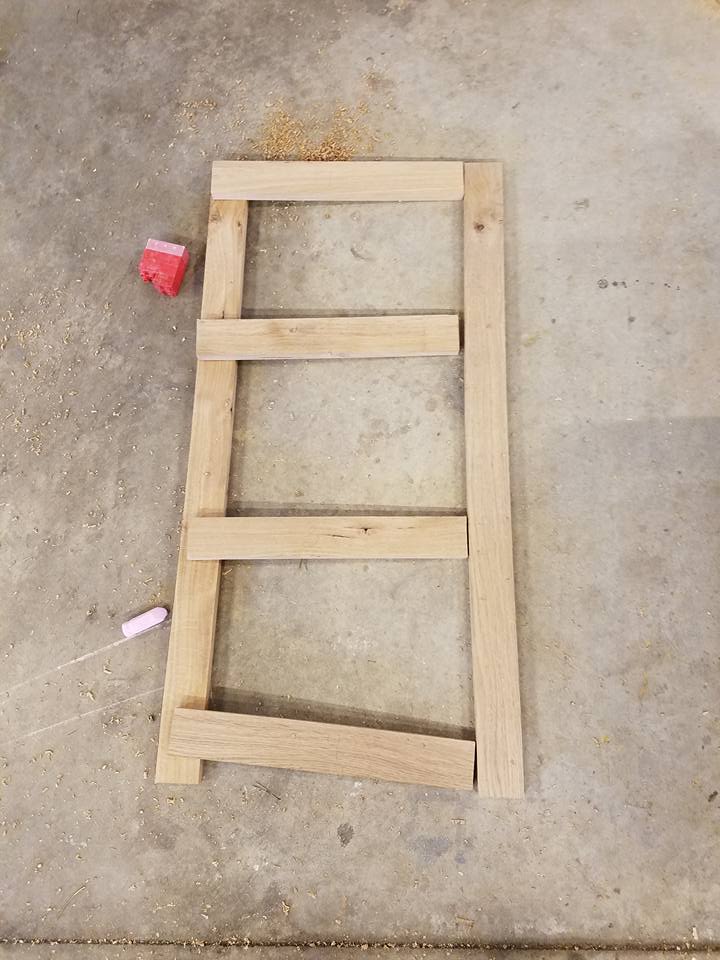
- Cut rails to length. Rails should be door opening – 1/8″ -width of your stiles + 2″.
- Make 1″ tenons on both ends of all of your rails. See more on mortise and tenon here. Cut 1/2″ off the bottom and top tenons of your middle rails, 1/2″ off the top of your tenon on your bottom rail and a 1/2″ off the bottom of your top rail tenon.
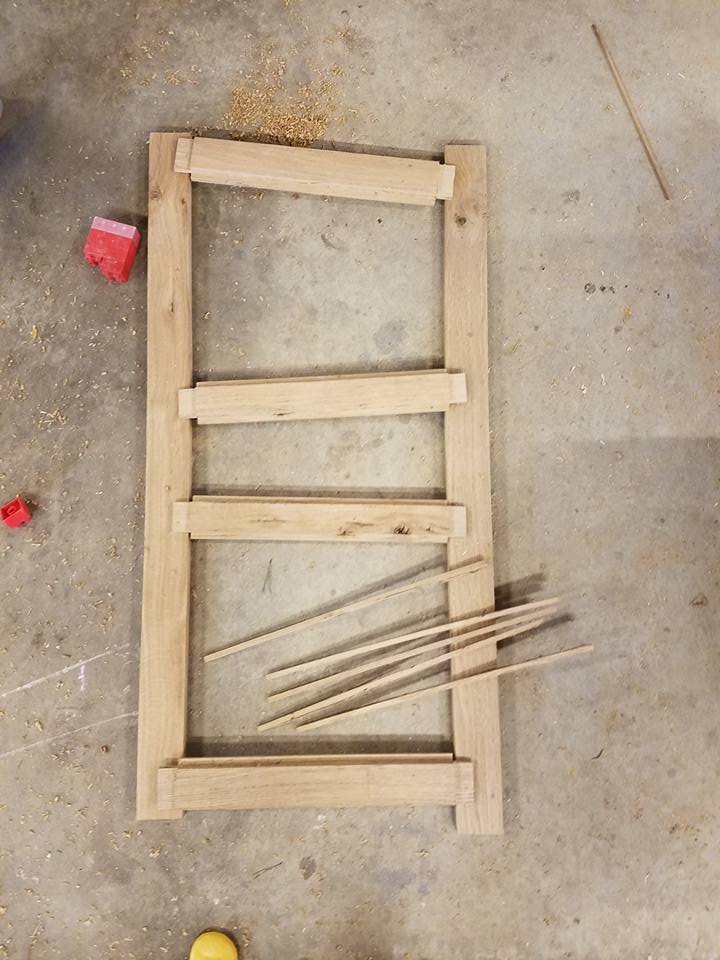
- Cut a 3/8″ x 3/8″ rabbet on the back side of both middle rails, the bottom of your top rail and the top of your bottom rail. Keep the scrap pieces to use to hold your glass in place.
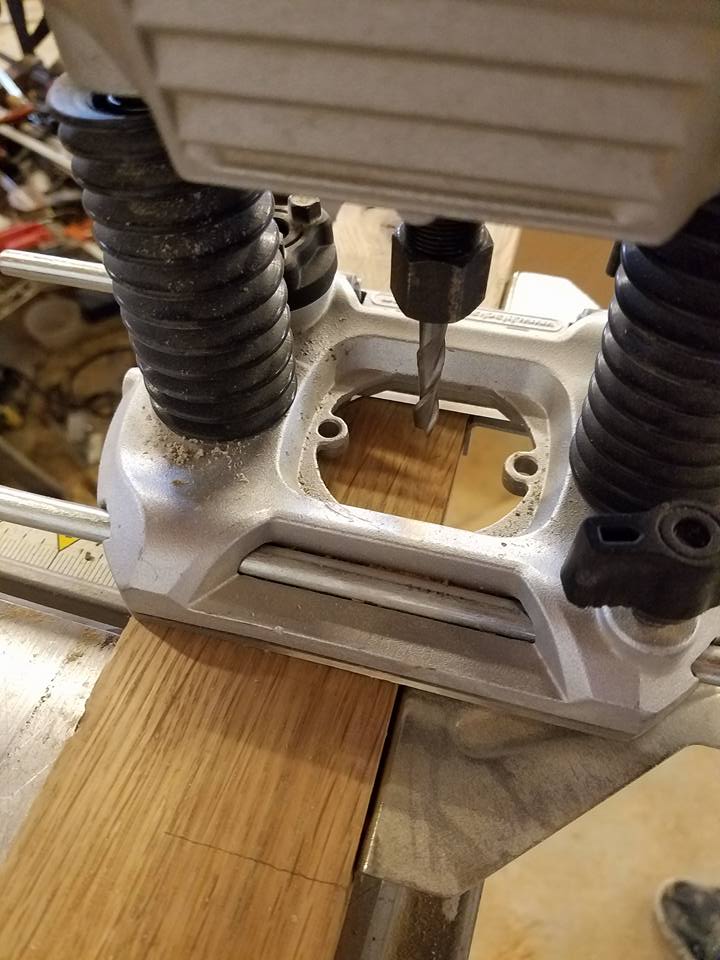
- Lay out your door and trace your tenons onto the edges of your style.
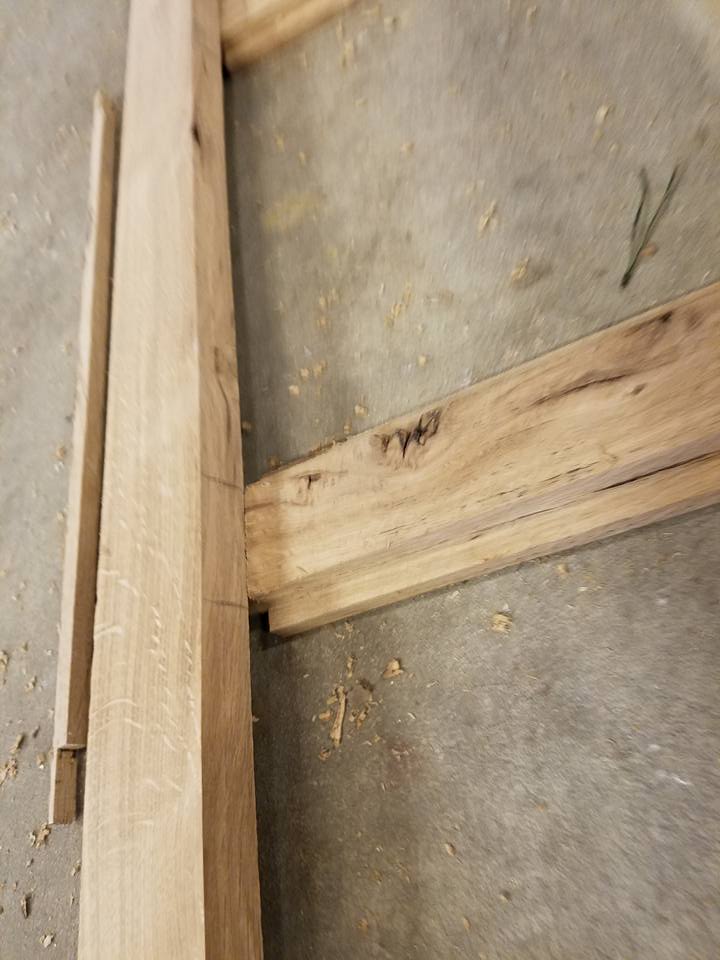
- Clamp your stiles to a sturdy surface use your plunge router to create a mortise hole. Dry fit your tenon after each cut. This should fit tight.
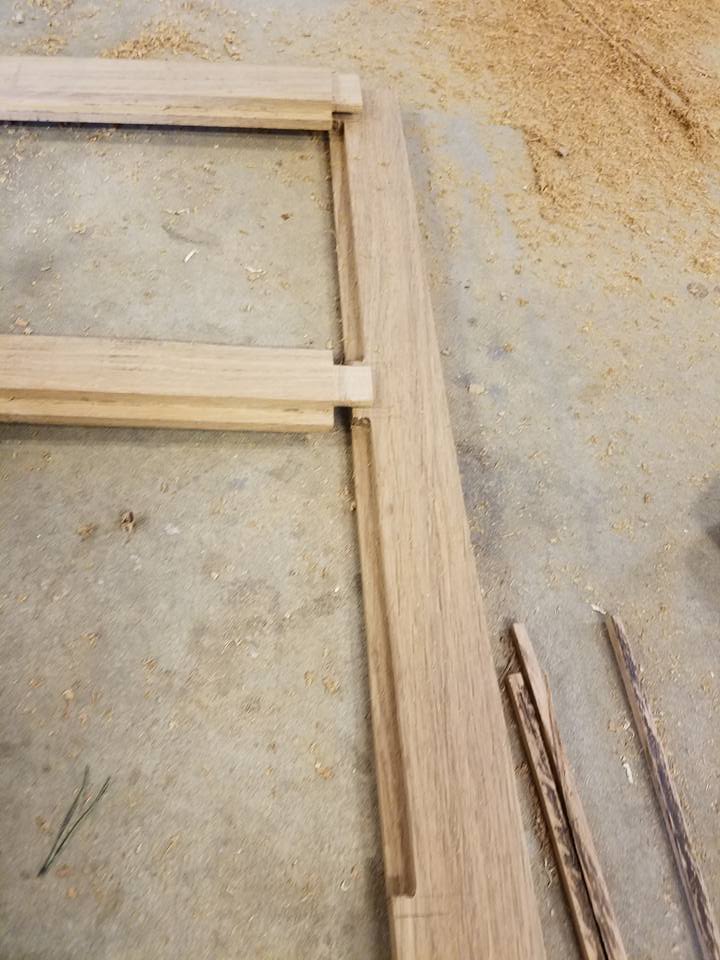
- Dry fit your door together and turn the door back side up.
- Place marks on the stiles where your rabbet edges of your rails meet the stiles.
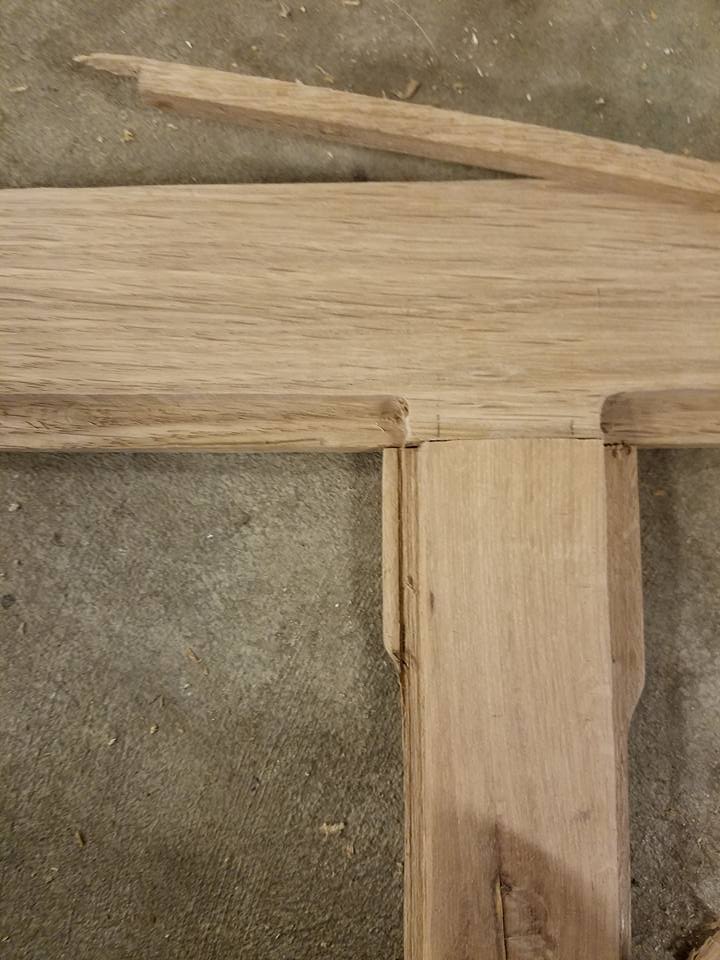
- Set the depth of your plunge router to 3/8″ and your fence to 3/8″. Create rabbet edge down the sides of your stiles in between your marks.
- If desired, add an edge detail to your rails. I used my router table with a round over bit. Use scrap pieces to test out your design. I slowly pushed my rails in 2″ from the end and pulled it out 2″ from the other end. It’s tricky and I need more practice before I do a tutorial on this. If you like the shaker style, skip this step.
- Sand the door pieces with 120 and 220 grit sandpaper and glue and clamp the door together.
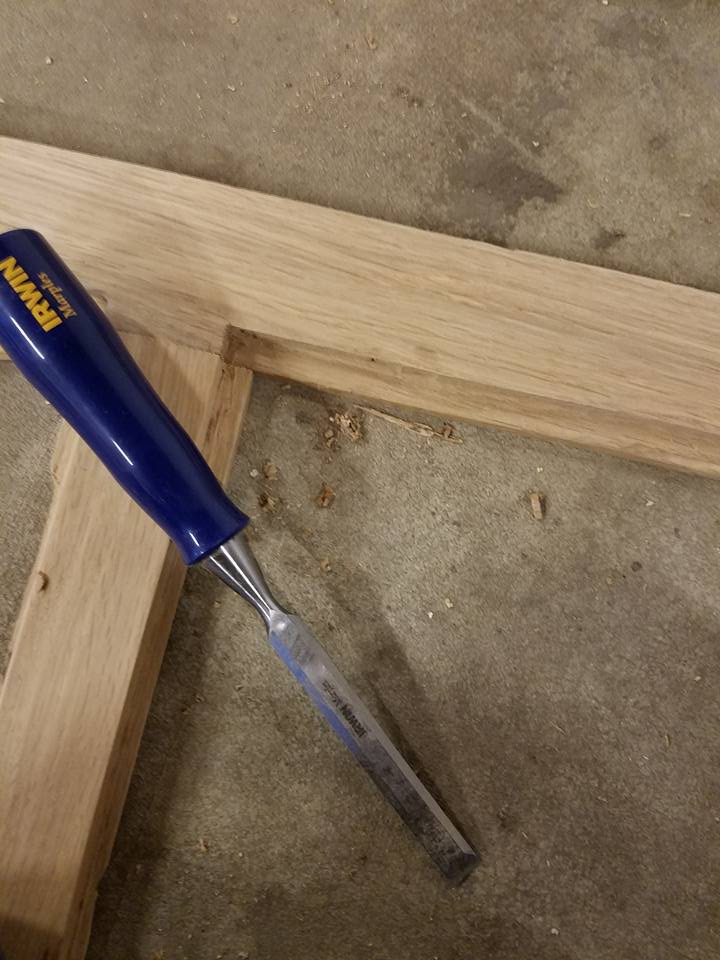
- After the door is dry, use a chisel to square up the routered rabbet edges on your styles.
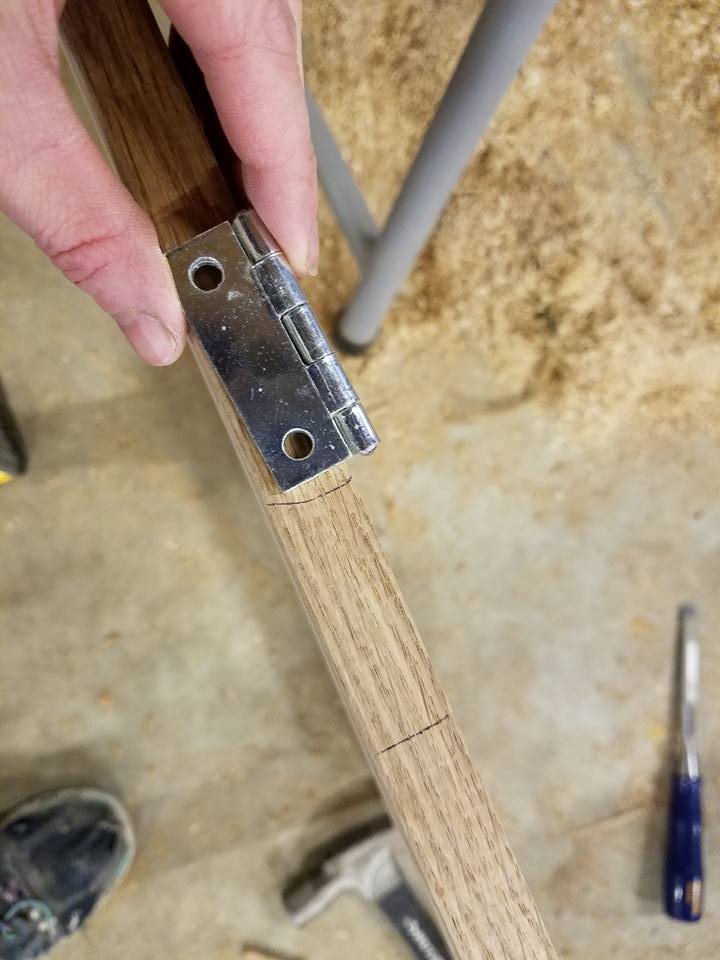
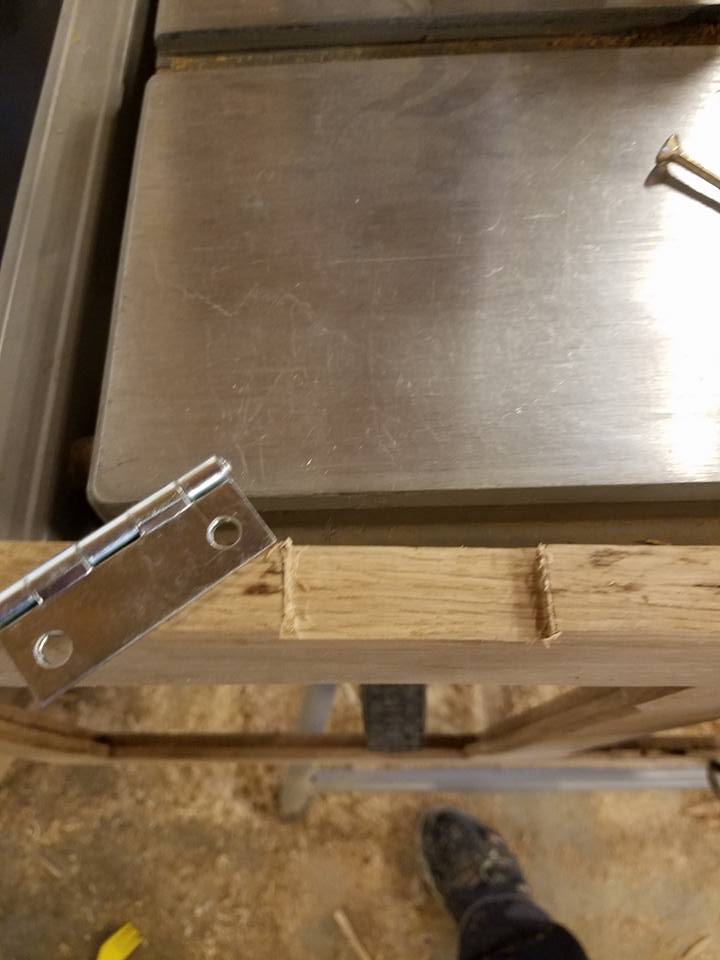
- Router into the hinge side of your door to recess your butt hinges.
- Use scrap wood to create more glass bead. (Create a 3/8″ x 3/8″ rabbet on scrap wood.)
- Stain door and all the glass bead. Sand with 220 grit sandpaper. Wipe down with a cloth dampened in mineral spirits. Seal with 2 coats of polyurethane sanding in between coats.
- Insert glass pieces and very carefully. Use a brad nailer with 5/8″ brads to secure the glass bead around the edges. Keep in mind that the glass bead is small and can split so keep your brad nailer in the center and fingers away. And obviously, keep the brad nailer as level as possible to prevent from breaking the glass.
- Install hinges onto the door and the door onto your cabinet.
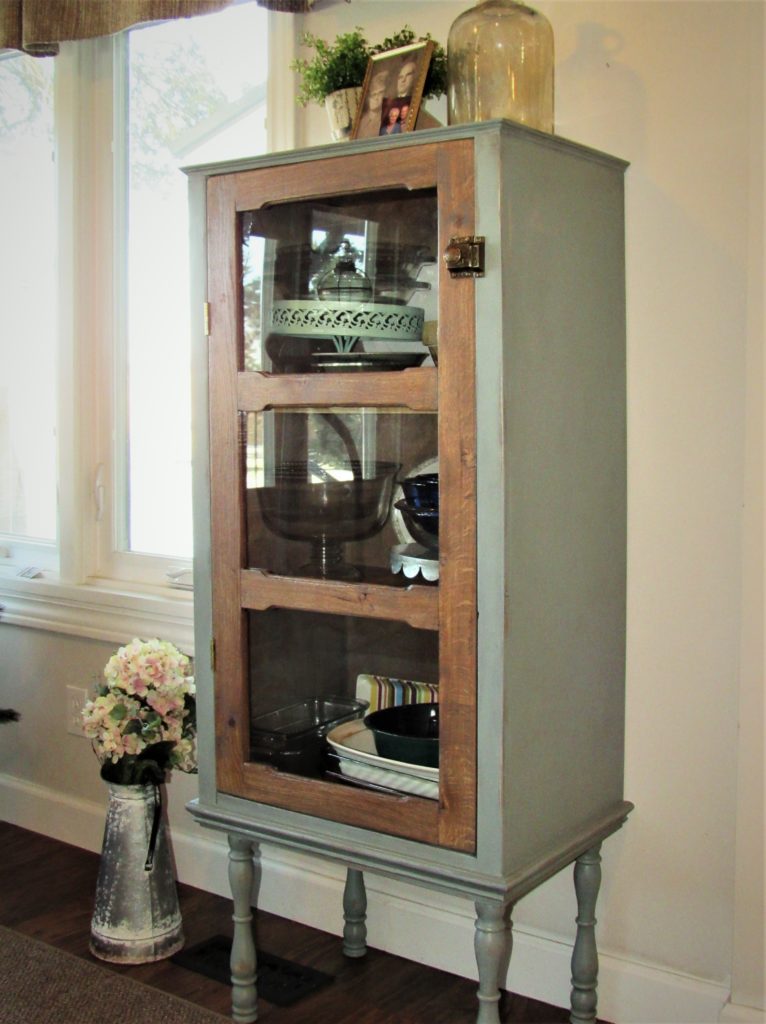
To go back the jelly cabinet plans that I built this antique style cabinet door for, click here.
Wow—this project turned out great! I’ve been trying to motivate myself to tackle a few DIY projects around the house. This post just pushed me towards actually doing a few of them. 😉
I love this! It turned out so cute. I might have to step up my crafting game.
http://www.amandasok.com
What a great DIY to try!
Oh I love this! I was just telling my husband how much I’d love to try and build my own cabinet.
This is great! Looks like another DIY project to add to the hubbies list!
This looks awesome and turned out so well! I am a sucker for antique/farmhouse style furniture. I am loving all the vintage and warn style decor.