
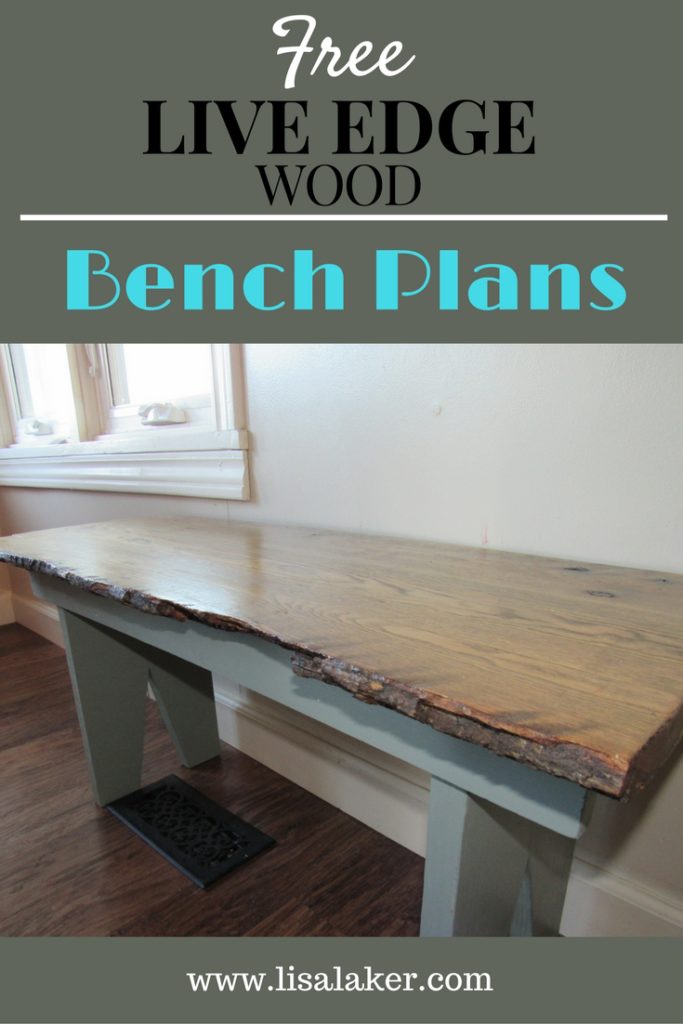
DIY Bench with Live Edge Top
Benches are fairly easy to build, fun to decorate with, and versatile enough to use to entertain or use as furniture! This DIY bench has a very simple base, a live wood edge top and can be finished for indoor or outdoor use! See how to build the top here.
Disclosure: This post includes affiliate links, which means I receive a small commission if you make a purchase through my links. There is no extra cost to you. Purchasing through my affiliate links help support my website so I am able to continue posting free content.
What you need for this project:
Tools:
Eye Protection
Ear Protection
Pencil
Measuring Tape
Table saw
(3) clamps
glue
120 and 220 grit sandpaper
orbital sander
paint – I used exterior SW Halycon Green
paint brush
miter saw or circular saw
band saw or scroll saw
drill
1/4″ drill bit
3/8″ Forstner Bit
Materials:
Live edge wood top
(1) 2 x 4 x 8′
(1) 2 x 10 x 3′
(4) wood screws 1 1/2″
First measure your top. You want the base to fit behind the shallowest part of your edge by an inch or 2.
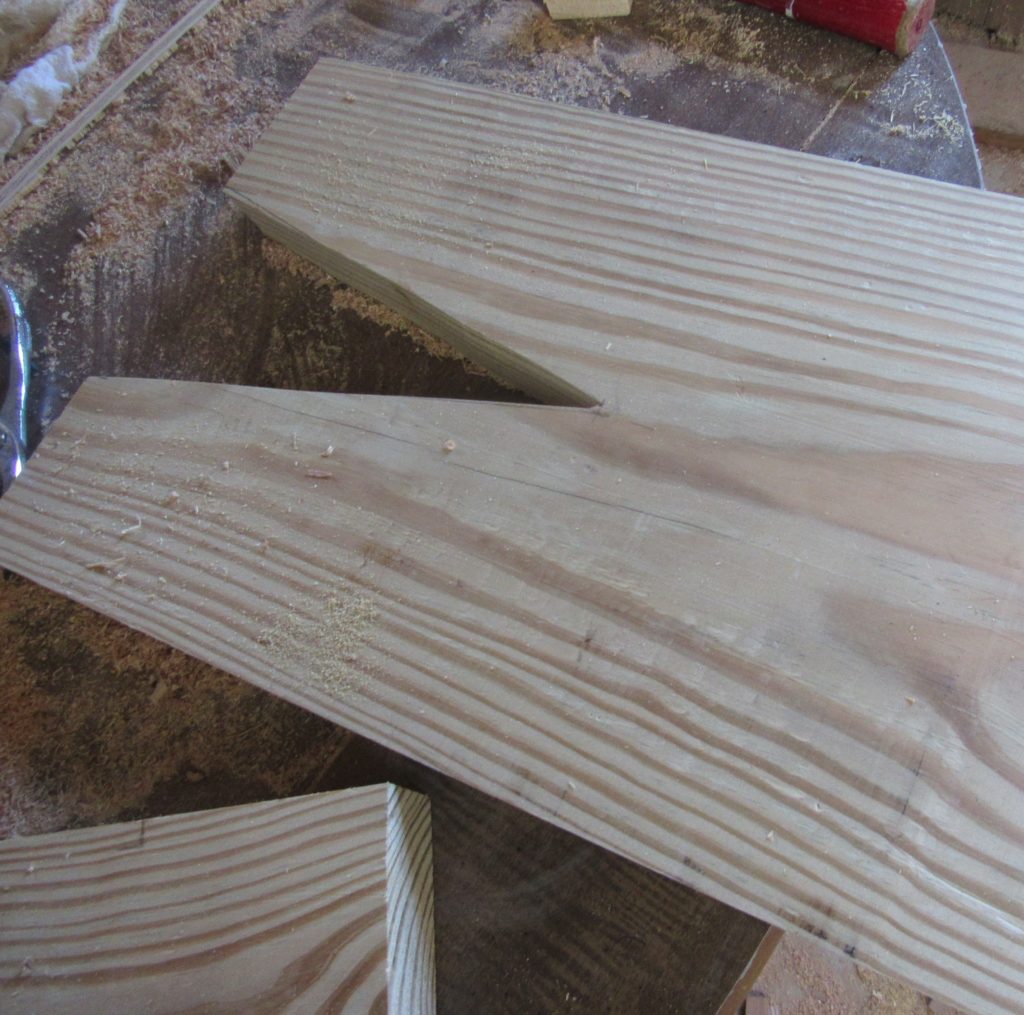
Rip down your 2 x 10 x 3 to that width. Cut 2 sections that are 17 H. Cut an upside down V into the legs with a scroll saw or a band saw. Band saw is better to use especially with this thickness and since it’s treated lumber. My band saw broke so I managed to do this with a scroll saw….. very slowly.
You also want your bench top edge to overhang your base by a few inches on each side. Cut the 2 x 4 x 8 into 2 sections that the are that length.
Create a dado groove in your 1×3’s starting 3″ on each side. The dado should be 3/4″ deep and as wide as your 2 x 10 legs. Do this by placing a mark on your board 3/4″ high. push the board up against your table saw blade and raise or lower your blade to that mark. Then set your fence at 3″ and use your miter guide to push your board through. Continue moving your fence out 1/8″ at a time. and resliding your board over the blade until your legs fit snuggly into the dado.
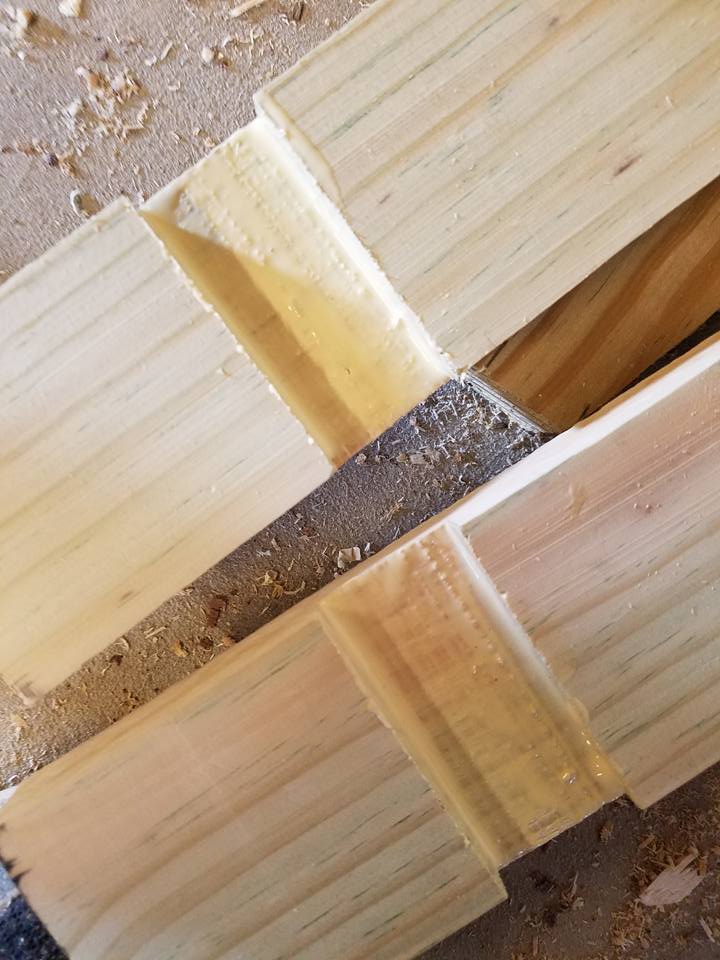
Cut your 1×3 x 2 to the same width of you bench legs and create a dado 3/4″ wide and 3/8″ deep in the center of you 1 x 3 x 4’s.
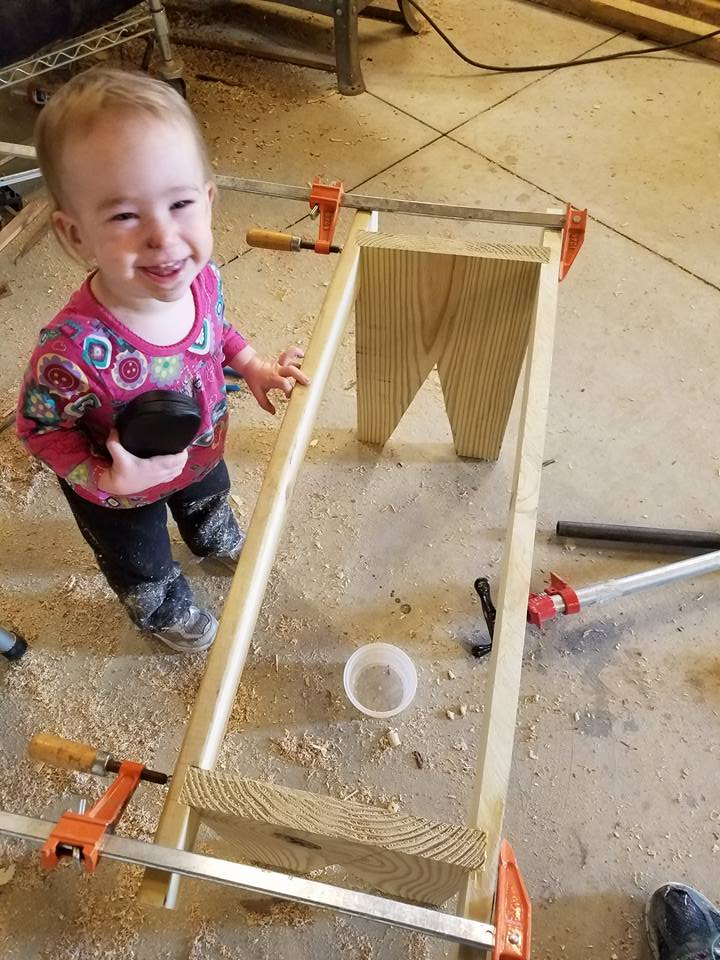
Apply a generous amount of glue into you dados. Fit your legs and center support into the grooves and clamp together. Allow to dry. Remove clamps and paint. I forgot to make a dado joint for the center support so I used a kreg jig to put one in. Sand your base with 220 grit sandpaper, wipe it down with a clean cloth dampened in mineral spirits and paint or stain the base.
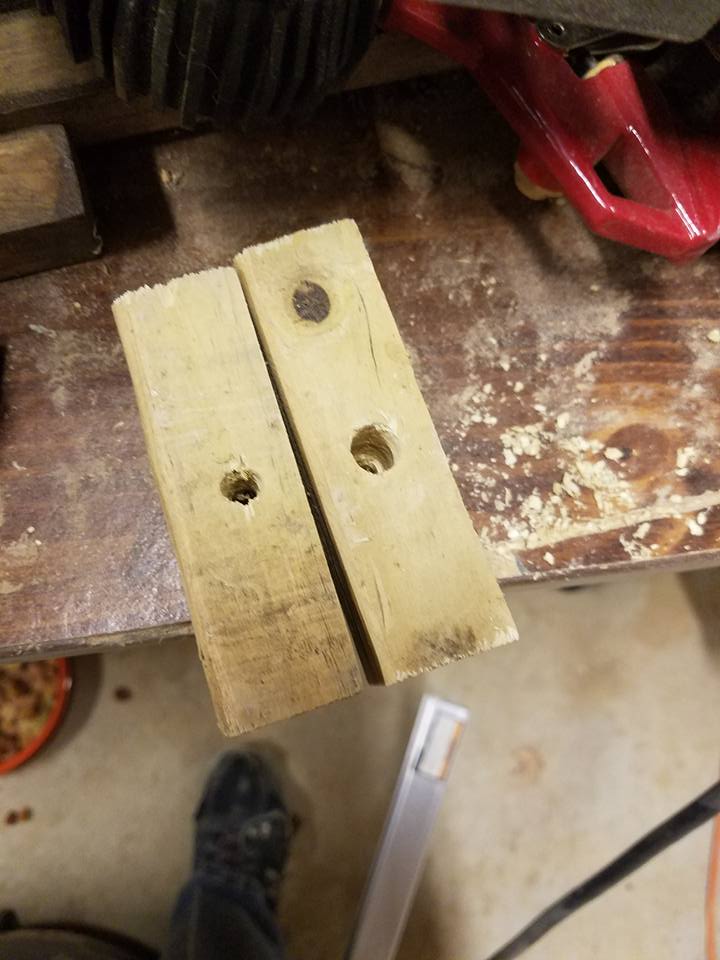
Use 2 x 4″ scrap wood and drill a 3/4″ deep hole with your 3/8 forstner bit. Drill the center with a regular bit and widen the hole by rocking the bit back and forth. This will allow for your top to expand and contract without splitting. Glue and clamp the chunks to the inside of the bench.
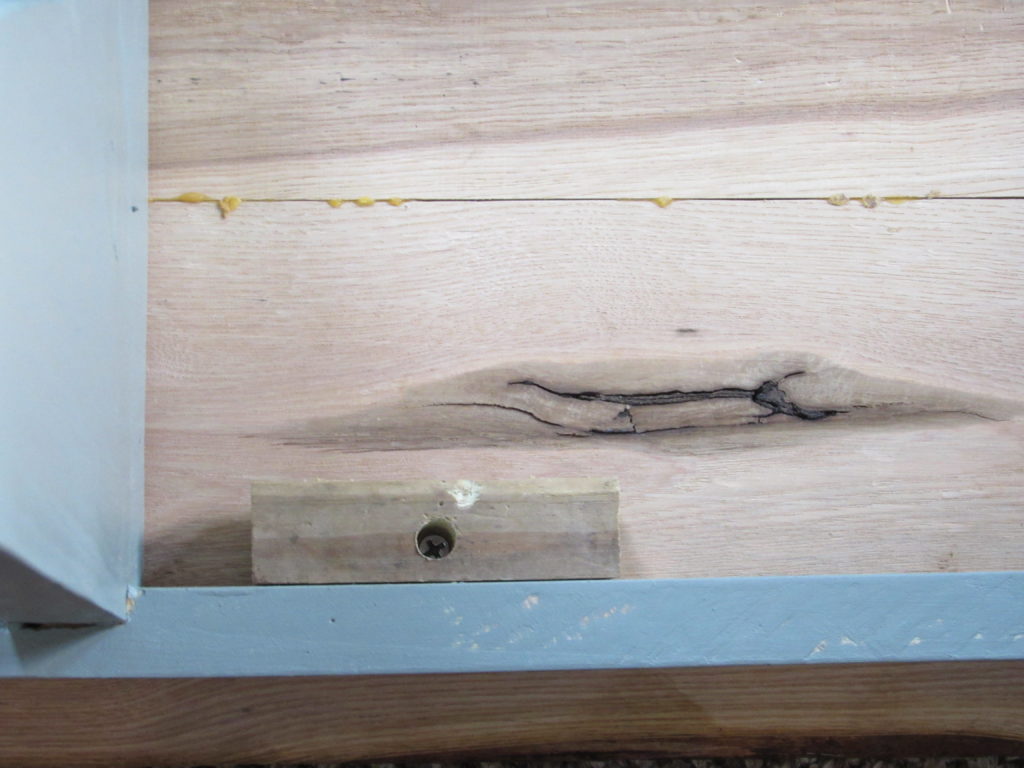
Lay the top on it’s face and center the base on it. Screw the base into the top through the holes you drilled in your wood chunk. Flip your DIY bench over and enjoy!
Check out this bench too!
Pingback: Coffee Table with Drawers - Free Woodworking Plans